Boresight Calibration

Direct Georeferencing
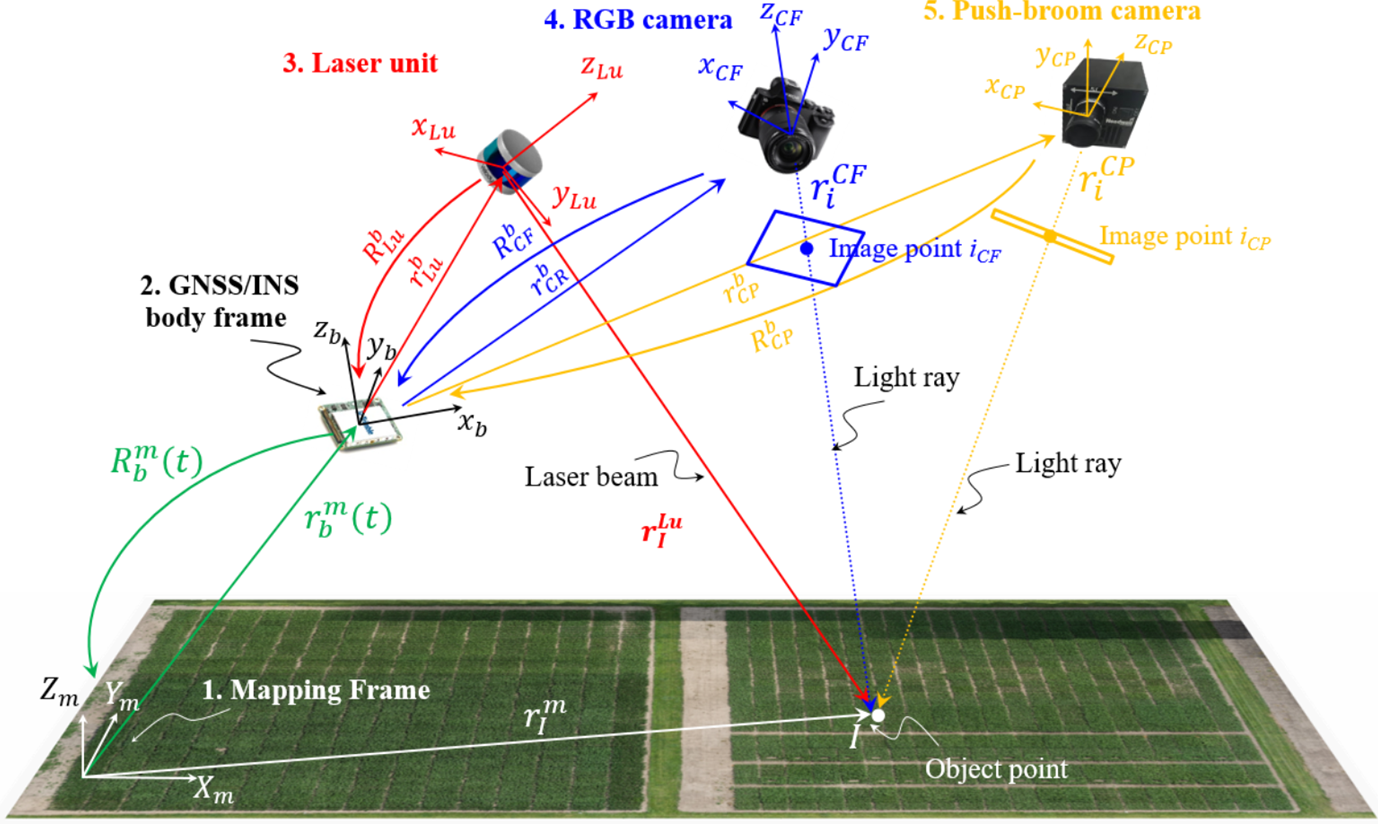
Rigorous objective calibrations ensure that parameters are valid for flights at any location, altitude, speed, etc. Without this, orthorectification results with a given set of parameters may vary. Our calibration method provides a report of the accuracy/quality of the calibration which is useful for assessing stability over time. In addition to the GNSS-INS and other sensor data, an accurate boresight calibration is crucial to the orthorectification process and our direct georeferencing approach that provide spatially accurate, well-aligned data products.

(GRYFN)

Calibration Methods

Frame Cameras (GCP-Based)

Frame Cameras go through a three-step calibration process. This process starts with an initial IOP calibration, then moves to an In-Situ calibration, and finally the results of these calibrations go through a refinement processes.

Initial IOP Calibration

The first step for frame camera calibration is to perform an initial interior orientation parameter (IOP) calibration. This involves physically moving the camera around a target grid and taking photos by hand at various angles, and heights. These images are then used in a software to select the center points of all visible targets in an image. Once the center points are measured, an initial IOP calibration is performed which includes solving for distortion, focal length, and other internal camera parameters.

Indoor calibration target field (GRYFN)

In-Situ IOP + Boresight Calibration

Once these values are derived, we perform an in-flight calibration where the camera is integrated into the full sensor package and mounted onto the UAV. This outdoor calibration is flown at various altitudes, speeds, and offsets over a field of targets. The imagery collected form this flight is then measured with the assistance of survey points taken at the center of each target.

EOP Refinement

Finally, these measurements and values are processed and refined in software to achieve final calibration values. These values will result in orthomosaics being generated within determined acceptable spatial accuracy ranges for the camera.

LiDAR (Profile-Based)

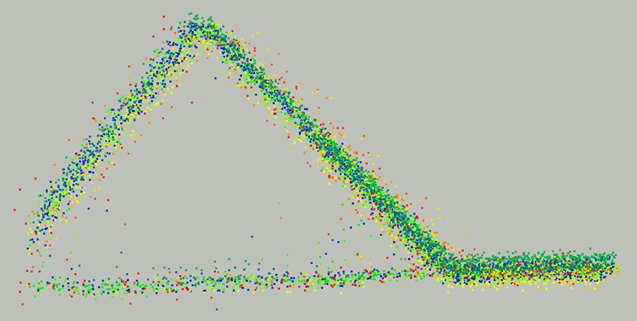
To perform a LiDAR calibration, the sensor is flown on the complete sensor package over a set of huts at various altitudes, offsets, and speeds. In software, profile targets are segmented from the full point cloud. From there, a supervised extraction of target profiles is performed from multiple discrete calibration passes in multiple flying directions, heights, and positions relative to the sensor. This process is iterated on to optimize boresight angles by minimizing discrepancies between profiles. The objective of this work is to minimize discrepancy between LiDAR point pairs from different flying “tracks” for correct boresight.

A poorly calibrated system will result in misalignment between point clouds captured from different tracks. (MDPI)
Accurate system calibration is achieved by minimizing the above-mentioned discrepancy. (MDPI)

Push-Broom/Line-Scan Cameras (GCP-Based)
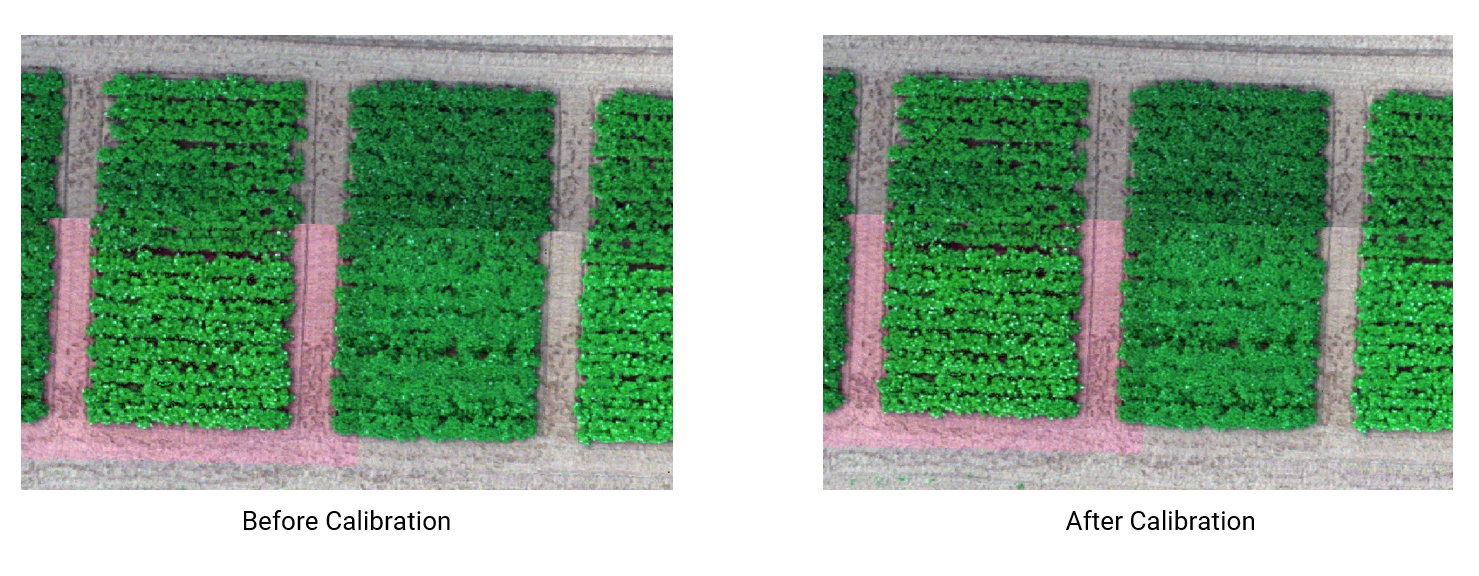
To calibrate these types of cameras we utilize a reformulated collinearity equation model where the image coordinates are represented as a function of the GNSS/INS position and orientation, GCP ground coordinates, lever arm components, and boresight angles. This data is collected with the line-scan camera integrated into the sensor package and flown at multiple altitudes and speeds over a target field. The objective of this calibration is to minimize discrepancy between image-based GCP measurements and their RTK ground truth from different flying “tracks” and solve for sensor to IMU time delays.

Just a raw 3-band view- not calibrated so shading/coloring is “off”. (GRYFN)

Last updated